How To Install Hardie Board Siding

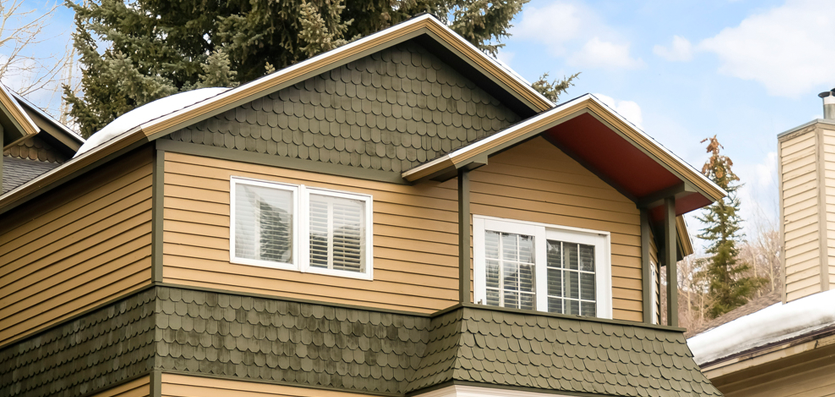
Hardie board siding offers an unmatched blend of durability, weather resistance, and aesthetic appeal for homeowners. If you are considering upgrading your home’s exterior, learning how to install Hardie board siding can be a valuable skill.
Not only does Hardie board siding protect your home from the elements, but it also enhances its curb appeal. The installation process can seem daunting, but with the right preparation, tools, and steps, you can transform the look of your home with Hardie board siding.
Benefits of Hardie Board Siding
Before diving into the installation process, it’s vital to understand the benefits of Hardie board siding. Unlike traditional vinyl, fiber cement siding such as Hardie board can withstand harsh weather conditions, including high winds, extreme temperatures, and heavy rainfall.
Furthermore, Hardie board siding is highly resistant to fire, rot, and pests, offering long-term protection for your home. It is available in various colors and textures, giving homeowners numerous design options. Choosing Hardie board for your home’s exterior ensures a durable and attractive result that can last for decades.
Preparing for Installation
The success of your siding service installation depends on proper preparation. To begin, remove the old siding, trim any overhanging vegetation, and inspect the underlying structure for signs of water damage. Ensuring a smooth, clean surface is vital to prevent any issues during installation.
Remove Existing Siding: If you are replacing old siding or starting from scratch, removing the old material is the first step. Carefully remove any nails or staples holding the existing siding in place. For easier removal, use a hammer and pry bar, and ensure that you clear away all debris from the area.
Inspect the Wall: After removing the old siding, inspect the wall for any visible damage. Look for signs of rot or water damage, as these issues can compromise the new siding’s integrity. If damage is found, replace or repair the affected area before moving forward.
Level the Surface: Use a level to ensure that the walls are straight. Uneven walls can lead to an improper fit and affect the final appearance of the siding. Once the wall is level, it's time to proceed to the next step: applying a protective barrier.
Applying House Wrap or Insulating Foam Sheathing
Before installing Hardie board siding, you need to create a moisture barrier for added protection. This step verifies that your home’s structure remains safe from water damage. Installing house wrap or insulating foam sheathing is vital to this process.
House Wrap: House wrap is a synthetic material that protects the underlying surface from moisture. It is installed by measuring and cutting it to size, then securing it to the wall with staples. The house wrap should overlap at the seams and edges to ensure maximum protection.
Insulating Foam Sheathing: In addition to house wrap, insulating foam sheathing offers extra protection by providing insulation and preventing air leaks. The foam is attached directly to the wall studs using screws or nails.
Measuring and Cutting Hardie Board Siding
Proper measurement and cutting are essential for certifying a precise and professional-looking installation. Accurate cuts minimize the need for adjustments and avoid unnecessary gaps between siding panels.
Measure the Wall: Begin by measuring the height and width of the wall to determine the amount of Hardie board siding required. Measure carefully and confirm that your measurements are consistent across the entire wall. It’s a good idea to measure twice to avoid errors that could waste material or create an uneven appearance.
Cut the Siding: Once you have your measurements, use a circular saw with a diamond blade to cut the Hardie board siding. For smoother cuts, use a saw with a dust collection system. When cutting the siding, verify that the pieces fit snugly against the wall without leaving gaps.
Installing the Siding Panels
Now that you have prepared the surface and cut your siding panels, it’s time to begin installation. The process involves securing the Hardie board panels to the wall studs using nails.
Start at the Bottom: Begin the installation at the bottom of the wall, verifying that the first panel is level. To create a proper angle for the first row, use a starter strip. The starter strip helps the first panel sit at the correct angle, certifying proper water runoff and a uniform appearance.
Install Panels: Use a pneumatic siding nail gun to secure the panels in place. The nails should be placed every 6-10 inches along the top edge of the panel, ensuring that they are hidden beneath the next row of siding. When installing siding, it’s essential to stagger the seams between panels to achieve a more attractive, seamless appearance.
Check for Alignment: As you move upward, periodically check the siding's alignment. A level can help verify that the panels are evenly spaced and that the siding remains straight. Staggering the joints between panels not only creates a professional appearance but also ensures that the siding fits properly without any gaps.
Installing the Trim for a Professional Finish
Trim is an essential finishing touch when installing Hardie board siding. It adds a clean, polished look around windows, doors, and corners. Not only does trim help to frame these areas, but it also covers any small gaps between the siding and the wall, ensuring that everything is sealed correctly.
Install Corner Trim: Start by measuring and cutting the corner trim pieces to fit the corners of your home. Make sure the trim pieces are aligned with the edges of the siding and nailed securely into place. Corner trim is typically installed after the siding panels are in place, as it helps cover the gaps and gives the appearance a more finished look.
Install Window and Door Trim: Next, measure and cut trim for around windows and doors. Like corner trim, window and door trim should be securely nailed into place. Be sure to use caulk to seal any seams between the trim and the siding to prevent water from seeping behind.
Trim Edges for Neatness: After the main trim pieces are in place, you may need to add additional trim to cover any remaining gaps. This is particularly important around edges, where the siding may not fit perfectly. Use small trim pieces to cover these areas and create a smooth, even look.
Cleaning Up and Final Inspection
Once your Hardie board siding is fully installed, it’s time for a thorough cleanup and inspection. This final step certifies that the job was done correctly and that your home looks its best.
Clean Up the Site: Begin by removing any leftover materials, such as scrap pieces of siding, nails, and other debris. Use a magnetic roller to pick up any loose nails from the ground to prevent accidents. Sweep the area to ensure the worksite is clean and free from hazards.
Inspect the Siding: Take the time to carefully inspect the entire installation. Check that all the seams are properly sealed, the trim is aligned, and there are no visible gaps between the panels. Look for any areas that might need additional caulk or adjustments.
Final Thoughts on Installing Hardie Board Siding
At Naylor & Son’s Roofing, we believe in providing homeowners with the best exterior solutions to protect and enhance the beauty of their homes. Our family-owned business has been serving the Fort Wayne area for over 50 years, and we take pride in delivering exceptional customer service and craftsmanship.
Feel free to reach out to us for any siding installations or repairs, and let us help transform your home with Hardie board siding!
